
 As a huge fan of Linus Tech Tips I noticed from time to time that they used a test bench to benchmark their hardware. Being somewhat of a PC enthusiast myself, I decided I should get a test bench. After some research and being influenced by the one that Linus used, I decided I needed a "Top Deck Tech Station" by HighSpeed PC. I would have loved to just buy it right then and there, but unfortunately i'm a maker and tinkerer.
This meant I needed to make my own computer benchmarking test bench.
NOTE: This is a very rough guide. It ended up working well for me, but I can't guarantee the same results for you. Build at your own risk, PC components are prone to electrostatic discharge (ESD).
The Parts
| QTY | Item | Price |
|---|---|---|
| 1 | 10" x 36" Rubbermade Wood Shelf | $6.81 |
| 1 | 5' x 1/2" Conduit | $2.30 |
| 4 | 1" Corner Braces | $3.28 |
| 1 | 10' of 7/8" OD 5/8" ID PVC Tubing | $9.98 |
| 4 | 1/2" Steel Clamp Looms | $0.87 |
| 2 | 5/8" Stainless-Steel Hose Clamps (optional) | $0.83 |
| 1 | 48" x 3/4" piece of flat steel (optional) | $4.71 |
| 1 | PC Screw Set (optional) | $9.99 |
Total: $25.85 - $42.21 (depending on what optional parts you use)
The total could have been a lot less if I didn't need the standoffs or if tubing was available by the foot.
The Build
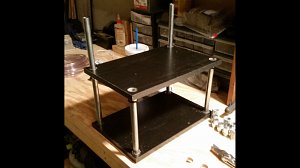
First what I needed to do was cut the piece of wood to the proper size. In my case I chose to accommodate an ATX motherboard (12" x 9.6") so I cut 2 pieces that were 15" x 10" for the top and bottom shelf. This allowed enough room for the length of the motherboard and conduit on both sides.
From there, I used a 7/8" hole saw to drill holes approx .25" from each corner. The reason why I chose that diameter was so that the clear tube will fit nice and tight with the conduit in the middle. It acts as a spacer that allows you to adjust the height of the shelf. (I'm sure there are better ways to attach the shelf to the conduit but this ended up working really well.)
After drilling those holes I grabbed some engineering diagrams of an ATX motherboard from which I was able to mark the exact locations of the motherboard standoffs. I used a nail to mark the the board. This part can be very tricky. It is essential that you measure the distance between the standoffs perfectly so that all of the holes in the motherboard line up.
Measure twice, cut once.
After I had the locations of the standoffs marked, I used a 3/32" drill bit to drill the holes. It will be a tight fit for the standoffs, but that is much better than too loose. You can hand tighten or use a wrench to screw in the standoffs.
Next, you need to cut 8 pieces of the acrylic tubing each approx. 0.625" in length. These will go on the outside of the conduit and inside the holes you drilled on the board.
Now you can cut your conduit to the size you desire. You want to make sure you have enough room to clear the power supply that will rest on the bottom shelf. Make sure that the back two pieces of conduit are long enough to attach a bar for your expansion cards, like graphics cards, to rest on if you choose to add it. (The bar is optional.)
Place 1 Piece of acrylic tube on the bottom of each of the 4 pieces of conduit and then place them in the holes on the bottom shelf. The bottom of the board and conduit/acrylic should be flush. If done properly it should be pretty tough to get them flush because it will be a tight fit. Place 1 more piece of tubing on each of the 4 posts at the height that you would like the top shelf. Place the top board on the posts and squeeze it onto the tubing. Again, this will be tough to do. When you have the top shelf in place, place 1 clamp loom on each post directly under the top shelf and bolt it together. This is to ensure the stability of the top shelf.
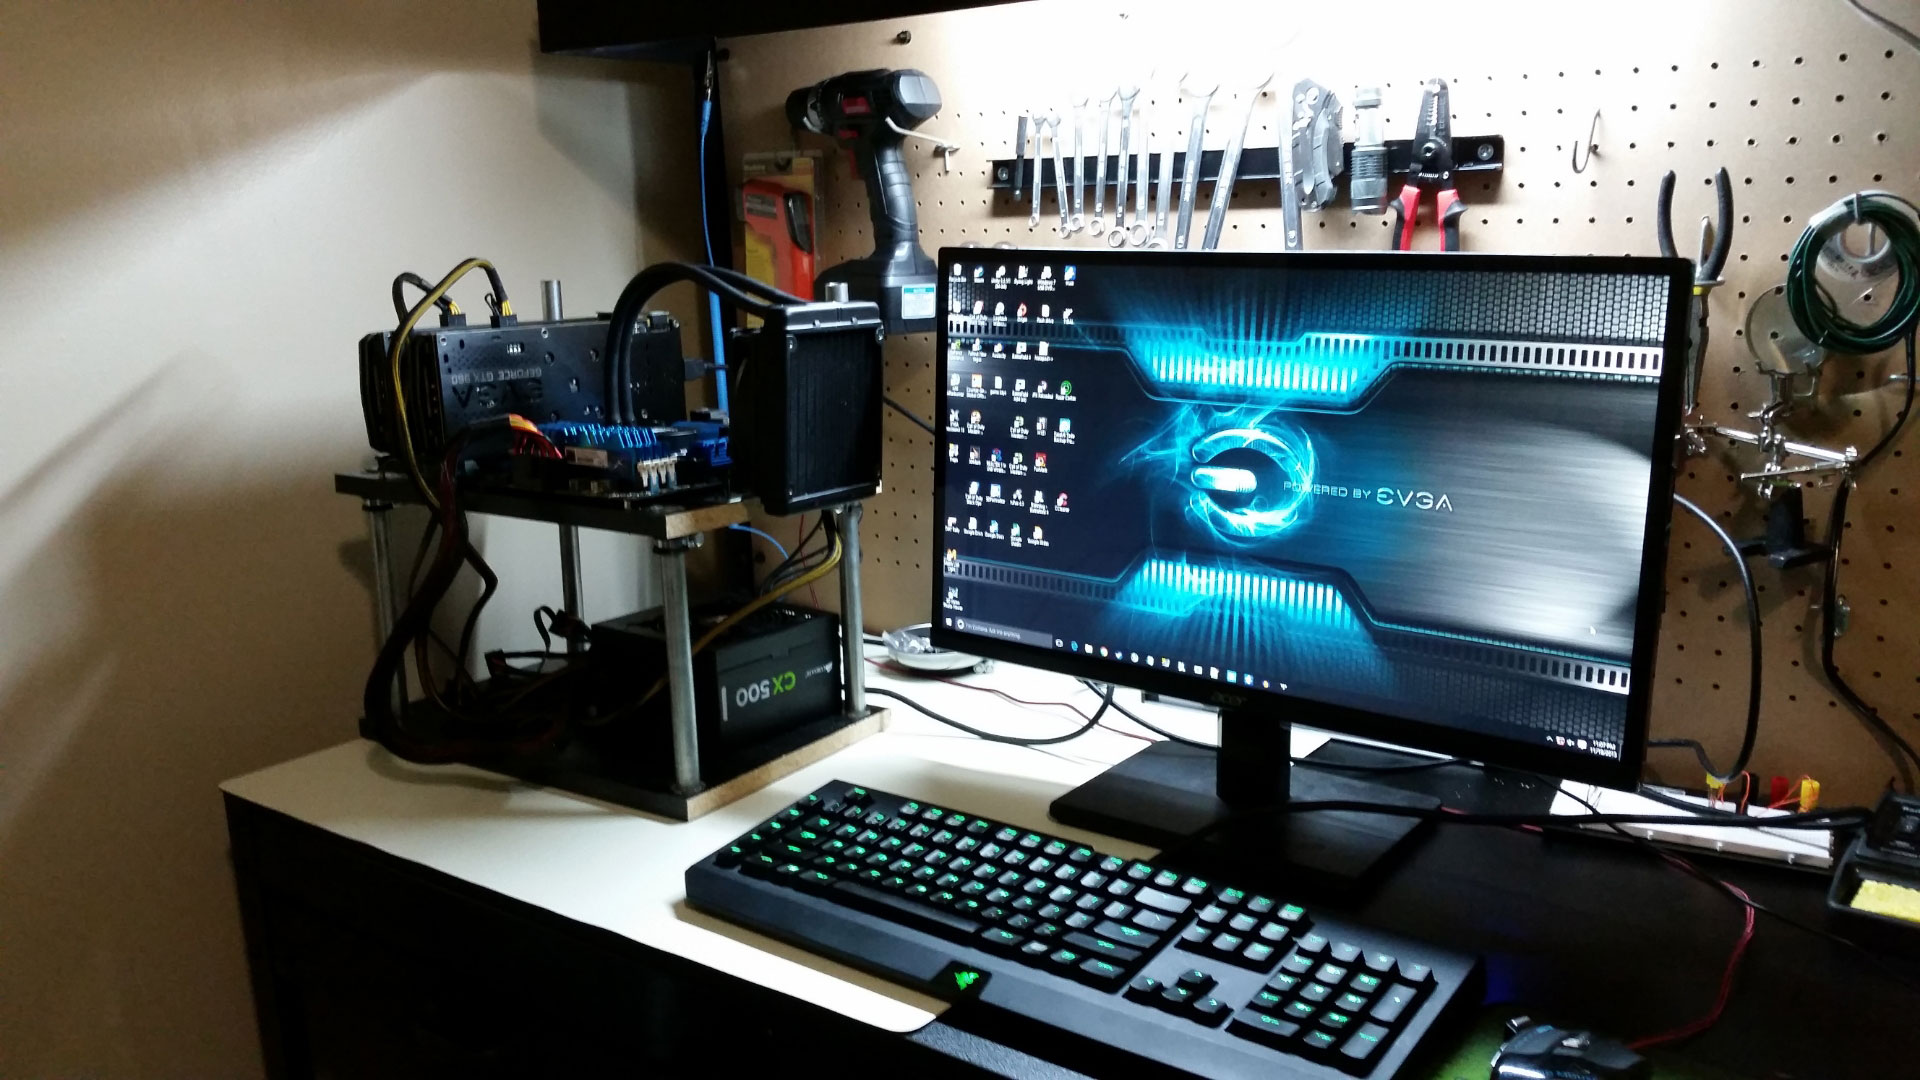
Now the test bench is essentially complete and anything else you do is optional.
The rail for expansion cards can be cut to the same length as the boards. Drill holes in the rail so you can attach it to corner braces. To attach the corner braces to the conduit poles, I found it easiest to use hose clamps.
Corner braces can be screwed to the top shelf to accommodate a case fan or AIO water cooler like you can see on the one that I made. Position them accordingly depending on the size of the fan and relation to what needs to be cooled.
Conclusion
 All in all, it was fun building this test bench but also really frustrating. Mine happened to turn out better than I expected and it works great. I chose to build mine the way I did, because I thought that using conduit made it look cool. I'm sure there are way better ways to make a test bench. Having said that, for most people it would be worth it to just buy one.
If anything don't use this as a guide, but for inspiration to design your own.
About the Author:

Nick Santini is a web developer and college student from Louisville, KY. Aside from his work as a web developer, he is also the man behind SANTINI.IO, a blog dedicated to technology, web design/development, self improvement, and more.
Latest Tweet

Nick Santini
@SANTINI_IO
As a Yankees fan, I still always loved to see that knuckleball. If you don’t make it to the hall of fame the baseball world will have made a mistake!
— Nick Santini (@SANTINI_IO) April 16, 2022